DIY Wall Shelves Using a Circular Saw
There’s nothing quite like adding your own custom storage to a space. Wall shelves are one of the most versatile upgrades you can make in a home—whether it’s to hold books, display decorations, organize tools, or bring order to a messy garage. One of the most effective and straightforward ways I’ve found to tackle this kind of project is to build DIY wall shelves using a circular saw. With a bit of planning, a few boards, and a steady approach, these shelves can be crafted in a single weekend or less.
You don’t need a workshop full of tools to pull this off. A reliable circular saw, a drill, and a handful of hand tools will get you from raw lumber to fully installed shelves. What I enjoy most about making these shelves is how customizable they are. You can tailor the length, depth, finish, and bracket style to fit your space and your style perfectly.
Why Build Wall Shelves?
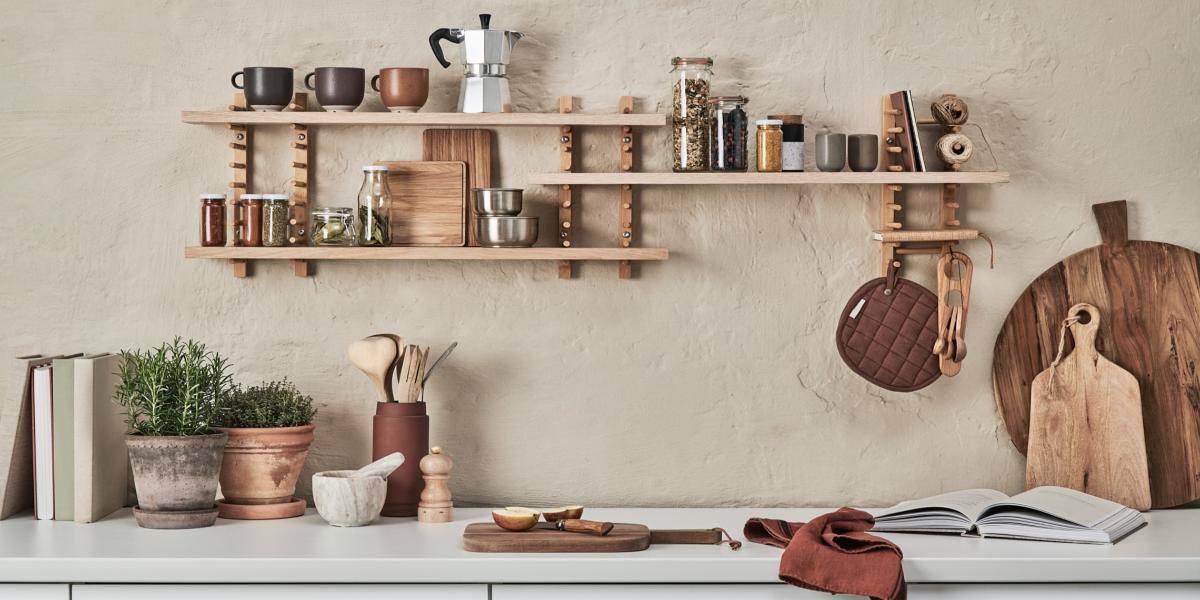
I’ve always found that wall shelves do more than add storage—they change the feel of a room. They add vertical interest, keep things off the floor, and help me use space I’d otherwise overlook. Whether it’s in a bedroom, hallway, kitchen, or shop, shelves bring structure and function without demanding much real estate.
Buying pre-made shelves can be expensive, especially for high-quality wood or custom dimensions. Making your own shelves saves money and lets you be creative. By using a circular saw, I’m able to get straight, accurate cuts even without a full table saw setup. It’s a perfect match for any DIYer working out of a garage, basement, or even a small apartment.
Planning Your DIY Wall Shelves
Before I started cutting, I always take time to sketch out a quick plan. I think about what I’ll be storing or displaying, and that helps determine how deep and wide the shelves should be. Common shelf depths range from 6 to 12 inches. Length depends on the wall and what kind of studs or brackets you’ll use.
I also choose a wood type based on budget and aesthetics. Pine and poplar are affordable and easy to work with, while oak or birch offer more durability and a polished look. For this project, I used 1×10 pine boards for a balance of cost and utility.
Materials and Tools
Here’s what I used to make my DIY wall shelves using a circular saw:
Materials:
- 1×10 pine boards (length depends on your shelf needs)
- Wall brackets or metal shelf supports
- 2” wood screws
- Anchors or toggle bolts (if not going into studs)
- Sandpaper
- Wood stain or paint
- Clear polyurethane or sealer (optional)
Tools:
- Circular saw
- Measuring tape
- Straight edge or guide (for accurate cuts)
- Clamps
- Cordless drill
- Stud finder
- Level
- Pencil
Having a straight edge guide for your circular saw makes a huge difference. I built a simple one using a scrap board and a few clamps. It ensures smooth, straight cuts every time.
Cutting the Boards
To start building my DIY wall shelves using a circular saw, I measured and marked the boards to the desired shelf length. I clamped a straight edge about 1.5 inches away from the cut line to guide my saw base. With the circular saw set to full depth, I made clean, confident passes through each board.
Cutting the boards is the most technical part of the job. I always double-check the blade is square to the baseplate and make sure the board is firmly clamped. Rushed or uneven cuts can make your shelves look crooked or wobbly once installed.
After cutting, I sand the edges and surfaces using medium grit paper. If I’m painting or staining the shelves, I move up to fine grit afterward for a smooth finish.
Adding Style and Detail
If you want a clean modern look, you can leave the edges square. For a softer, more finished style, I like to round the front edges with sandpaper or even cut a 45-degree bevel using the saw. You could also router the edges for a decorative profile if you have access to one.
Before finishing, I apply a wood conditioner (if staining) and then brush on my chosen finish. For a rustic look, I use darker stains. For a modern room, white paint works beautifully. Once dry, I sometimes apply a coat of polyurethane to seal and protect the wood.
Creating DIY wall shelves using a circular saw gives you the freedom to choose your shelf’s look and feel. You’re not stuck with whatever limited options a store provides.
Mounting the Shelves
Once the boards are prepped, it’s time to hang them. I use a stud finder to locate the studs in the wall and mark their locations with a pencil. If studs aren’t in the right position, I use wall anchors or toggle bolts to make sure the brackets hold securely.
I install the brackets at equal heights and distances, using a level to make sure the shelf will sit evenly. Then, I place the board on top, center it, and secure it to the brackets with screws from underneath or through bracket holes.
For longer shelves, I usually add a center bracket to prevent sagging. And if you’re hanging multiple shelves vertically, be sure to space them at least 12–16 inches apart, depending on what you’ll store.
Alternative Designs and Ideas
One of the great things about this project is that it adapts to any style. Some designs I’ve enjoyed include:
- Floating shelves: Use hidden wall cleats to make shelves appear as if they’re suspended without visible brackets.
- Box shelves: Build a rectangular frame with a back panel to create depth and dimension.
- Pipe brackets: Industrial metal pipes as brackets give a rustic, rugged look.
- Corner shelves: Cutting two triangular boards lets you make efficient use of corner spaces.
Each of these versions starts the same way—with solid boards cut using a circular saw. The rest is just detail work and creativity.
Safety Tips When Using a Circular Saw
Cutting wood accurately is satisfying, but I never take safety for granted. When building DIY wall shelves using a circular saw, I always follow a few key safety practices:
- Wear safety glasses and ear protection
- Use clamps to secure the board before cutting
- Keep both hands behind the blade at all times
- Wait for the blade to stop spinning before setting down the saw
- Check the blade guard regularly to ensure it moves freely
Taking a moment to set up properly avoids dangerous mistakes and leads to better cuts every time.
Benefits of Making Your Own Shelves
There’s a long list of reasons why I prefer making my own shelves rather than buying them:
- Customization: I control the size, color, wood type, and placement.
- Cost-effective: One 8-foot pine board can yield multiple shelves at a fraction of retail cost.
- Skill-building: Each project sharpens my measuring, cutting, and finishing abilities.
- Satisfaction: I love pointing to shelves in my house and saying, “I made those.”
Building DIY wall shelves using a circular saw also opens the door to more woodworking projects. Once you’re comfortable with cutting and installing shelves, you’ll be ready to build desks, cabinets, or furniture pieces.
Troubleshooting Common Issues
Sometimes even the simplest projects come with challenges. Here are a few hiccups I’ve dealt with and how I fixed them:
- Uneven cuts: Use a straight edge guide and double-check measurements before cutting.
- Wobbly brackets: Make sure you’re anchoring into studs or using the right wall anchors.
- Shelf tilting forward: Adjust bracket placement to balance weight more evenly.
- Paint or stain blotches: Sand more thoroughly and use a conditioner on soft woods like pine.
No project goes perfectly every time, but learning from the small missteps makes every future build better.
Project Cost and Time Breakdown
The price and time investment are modest compared to the payoff. Here’s a quick estimate:
Materials:
- Pine board: $10–$20 per board (depending on size)
- Brackets: $3–$10 each
- Screws and anchors: $5
- Stain or paint: $8–$15
- Sandpaper: $3–$5
Time Required:
- Cutting and sanding: 1–2 hours
- Staining/painting: 1–2 hours (plus drying time)
- Installing shelves: 1 hour
That means in one afternoon, you can build and mount a set of shelves for less than $50 total—and they’ll look far better than most store-bought options.
Final Thoughts
Making DIY wall shelves using a circular saw is one of the most rewarding projects I’ve tackled with simple tools. It’s accessible to beginners, scalable to more advanced setups, and incredibly practical. Whether I need to organize a cluttered corner or give a blank wall new purpose, shelves offer a fast, flexible solution.
With a reliable circular saw, some basic hardware, and a vision for your space, you can transform your walls into smart storage or stylish displays. There’s no need for fancy machinery or expensive lumber. Just take your time, plan your cuts, and enjoy the process of turning a few boards into something useful and lasting.
So grab your saw, lay out your design, and get to work. Once you finish your first shelf, you’ll already be thinking about where the next one will go.

