Beginner’s Guide to Using an Angle Grinder
An angle grinder is one of those tools I never realized I needed until I started taking on more advanced DIY tasks. It looks a little intimidating at first—spinning disc, sharp grinding noise, sparks flying—but once I got comfortable using it, I couldn’t imagine my workshop without one. Whether I’m cutting through metal, grinding welds, removing rust, or even slicing tile, the angle grinder has proven itself to be one of the most versatile tools on my bench.
For any DIYer ready to step up their game, this beginner’s guide to using an angle grinder is designed to walk through the basics, break down what it’s used for, highlight safety tips, and offer some real-world advice on getting the best results. It’s not just a matter of turning it on and pushing it into the material—there’s some technique involved, and learning that early will save you from ruined workpieces or worse, injury.
Let’s break down everything I’ve learned so you can get comfortable with your angle grinder and use it with confidence.
What an Angle Grinder Actually Does
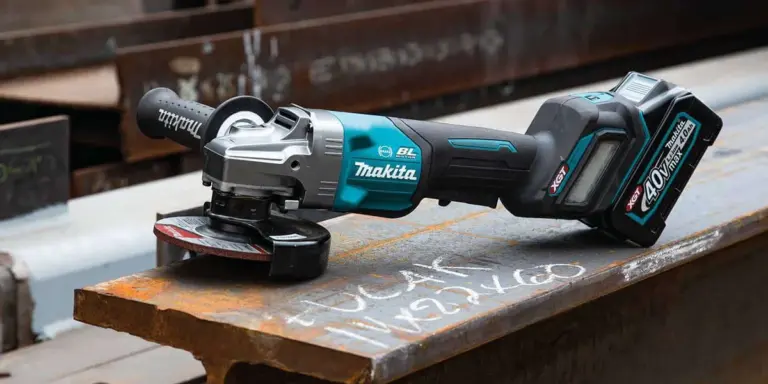
An angle grinder is a handheld power tool that uses a rotating abrasive disc to cut, grind, polish, or sand various materials. What makes this tool so handy is its versatility. With just a change of disc, I can go from cutting rebar to smoothing a rough weld, then swap in a wire brush to strip old paint or rust from a metal surface.
The spinning disc can reach speeds up to 12,000 RPM, depending on the model. It’s this power and speed that gives it the ability to work through dense materials like steel, concrete, or tile. Angle grinders come in corded and cordless versions, with sizes typically ranging from 4.5 to 9 inches. I usually stick with the 4.5-inch variety for general DIY use because it’s easier to handle and perfect for light to medium tasks.
Choosing the right disc is key to getting good results. There are cutting discs for metal or masonry, grinding discs for smoothing welds, flap discs for blending surfaces, and even diamond blades for slicing through tiles. If you’re just getting started, investing in a small disc kit gives you the flexibility to try a variety of tasks.
Essential Safety Tips
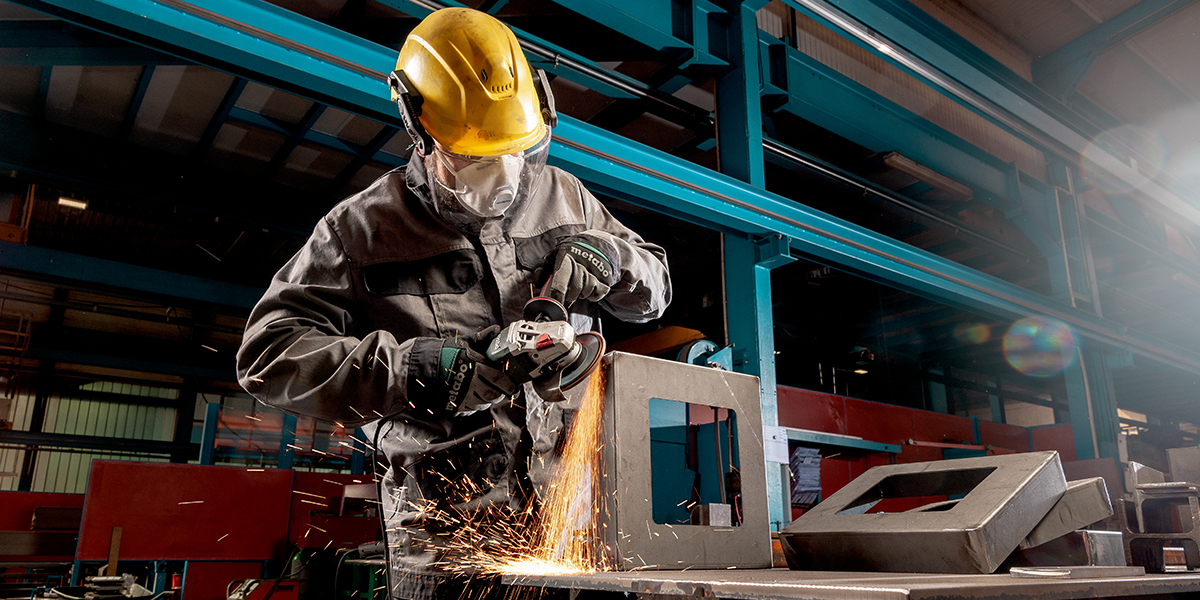
Using an angle grinder without the proper safety gear is a recipe for disaster. The tool spins incredibly fast, and if a disc shatters or kicks back, things can go south in seconds. One of the most important lessons I’ve learned in this beginner’s guide to using an angle grinder is to never skimp on protection.
I always wear safety goggles or, preferably, a full-face shield. Flying debris is almost guaranteed. A good pair of leather gloves protects my hands from sparks and rough edges. Ear protection is also a must—the noise levels can be surprisingly high during extended use. And don’t forget long sleeves or a welding jacket if you’re working with metal.
Another crucial safety step is checking the disc before use. If there are cracks, chips, or warping, I toss it. A compromised disc can shatter under rotation and become dangerous. I also make sure the guard is in place and oriented correctly to deflect sparks and fragments away from me.
Setting Up Your Workspace
Having a proper work area makes a huge difference in both safety and accuracy. I never use an angle grinder in a cluttered space or on an unstable surface. For most tasks, I secure my workpiece with a vise or heavy-duty clamps on a workbench. That way, I don’t have to fight both the material and the tool at the same time.
Good lighting is also essential. Shadows can hide edges or flaws that might cause the disc to catch. And since there will be sparks, I keep flammable materials far from the work area. I also make sure there’s decent ventilation, especially when grinding or cutting metal. If I’m working indoors, I’ll use a shop fan and wear a dust mask or respirator.
One tip I always follow: have a fire extinguisher nearby. Sparks have a way of finding flammable corners. It’s a small precaution that can prevent a major accident.
Holding and Controlling the Tool
Proper grip and control are vital. The grinder will try to twist in your hands if you let it, especially when the disc meets resistance. I always keep both hands on the tool—one on the main handle and the other on the side handle, which helps with balance and directional control.
Let the tool do the work. I don’t force it into the material. That’s how you ruin your discs and overheat your workpiece. A light, consistent pressure gets better results. With a cutting disc, I keep the grinder straight and move slowly to maintain accuracy. With a grinding disc, I tilt it slightly (about 10 to 15 degrees) to smooth out welds or remove material evenly.
Kickback can happen if the disc catches an edge or binds in a cut. That’s why I never cut too deeply in one pass. It’s better to make multiple shallow passes than force one deep one. I also avoid turning the grinder mid-cut, which can lead to binding and dangerous torque.
Types of Discs and What They’re For
A big part of the beginner’s guide to using an angle grinder is figuring out what disc to use for which task. Discs are easily interchangeable and usually secured with a spindle lock and a wrench that comes with the tool. Here’s a quick breakdown of the most common types:
- Cutting Discs: Thin and sharp-edged, designed for slicing through metal, pipes, rebar, or bolts.
- Grinding Discs: Thicker and stronger, these are for removing material quickly. I use them for smoothing rough welds and shaping steel.
- Flap Discs: These have layers of sandpaper-like material and are great for smoothing and finishing. They offer a more polished result than a grinding disc.
- Wire Brush Attachments: Ideal for stripping rust, paint, or corrosion. They also work well for cleaning welds.
- Diamond Blades: These are my go-to for tile or stone. They’re pricey but worth it for a clean cut.
Every time I change the disc, I check that it’s seated correctly and spins freely before touching it to the material. Loose or off-center discs cause wobbling and unpredictable cuts.
Common DIY Tasks for Angle Grinders
The number of jobs I’ve done with an angle grinder keeps growing. It’s one of the few tools that bridges the gap between metalwork, woodworking, masonry, and even automotive tasks. Here are a few practical ways I use mine:
- Cutting metal: Pipes, angle iron, rebar, and bolts—this is one of the main reasons I bought an angle grinder. With a good cutting disc, it breezes through mild steel.
- Smoothing welds: After MIG welding, I’ll use a grinding or flap disc to flatten the bead and clean up the joint.
- Removing rust: Wire brush wheels or sanding attachments work great for prepping metal before painting or welding.
- Cutting tile: A diamond blade makes short work of porcelain and ceramic tiles, especially for curved or odd cuts.
- Sharpening tools: I’ve used it to sharpen mower blades, hatchets, and even shovels in a pinch.
Each task takes a slightly different approach, but the core techniques remain consistent: steady control, correct disc, and clean workspace.
Tips for Better Results
Getting professional-looking results from an angle grinder doesn’t require years of experience—just a little patience and attention to detail. One of the biggest things I’ve learned in this beginner’s guide to using an angle grinder is that smoothness matters more than speed.
I avoid leaning into the tool or using it aggressively. Instead, I keep a consistent rhythm and let the disc wear down the material gradually. If I’m grinding, I go over the surface in overlapping passes, like mowing a lawn. That gives a uniform finish and avoids gouging.
Cooling the workpiece is important too. Metal heats up fast under friction. I’ll keep a bucket of water nearby or take breaks to prevent warping or overheating the material. Some grinders have vents to help with this, but it’s always smart to be proactive.
Maintenance is another key factor. I blow out dust from the motor vents with compressed air, check the brushes every few months, and store the grinder in a dry place. A well-maintained tool performs better and lasts longer.
What to Look for When Buying Your First Grinder
Not all angle grinders are created equal, and picking the right one for your needs can be confusing. I always recommend starting with a 4.5-inch model—it’s the most common size and works well for general DIY use. Corded grinders usually offer more power, but if portability is a priority, cordless models are catching up quickly in performance.
Look for a model with a variable-speed trigger or dial. Being able to slow down the RPM is helpful for more delicate work, like polishing or using a wire brush. A tool-less guard adjustment is also handy so you can reposition the guard without reaching for a wrench.
Comfort is huge. I try to pick a model with a padded grip and a side handle that can be mounted in different positions. It gives me more flexibility depending on the task and my working angle. Finally, make sure the grinder accepts standard accessories. Some budget models are limited in disc compatibility, which can be frustrating down the line.
Final Thoughts
This beginner’s guide to using an angle grinder is really about building confidence with a powerful and capable tool. The more I use mine, the more I rely on it for an ever-expanding list of tasks. From rough cuts to fine finishing, it’s become a go-to in my DIY lineup.
As long as you respect its speed, follow basic safety rules, and choose the right disc for the job, you’ll find it opens up a world of possibilities. Whether you’re cutting metal, cleaning up welds, or slicing tile for a bathroom remodel, the angle grinder can do it all.
With a little practice, you’ll be comfortable using it for tasks you might not have considered before—and chances are, you’ll wonder how you ever did without it.